close
Loading. Please wait...
X

Sign up for special offers:


How to Install and Care for Sheer Shadings: A Complete GuideLearn how to properly install and maintain sheer shadings. Get expert tips for correct installation, routine care, and preventing damage to keep your window treatments looking and performing their best.
Lexi Westingate | Blinds Chalet Design Team
FacebookFacebookTwitter (X)Pinterest
Updated: Oct 3 2024

How to Install and Care for Sheer Shadings: A Complete Guide image
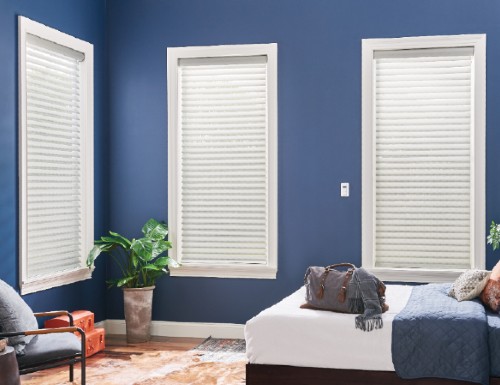
Sheer shadings are a stylish and functional window treatment, known for their ability to softly diffuse light while offering privacy. To make the most of your sheer shadings and extend their lifespan, proper installation and regular maintenance are key. This guide will walk you through essential installation steps and offer tips to keep your sheer shadings looking great and working smoothly.

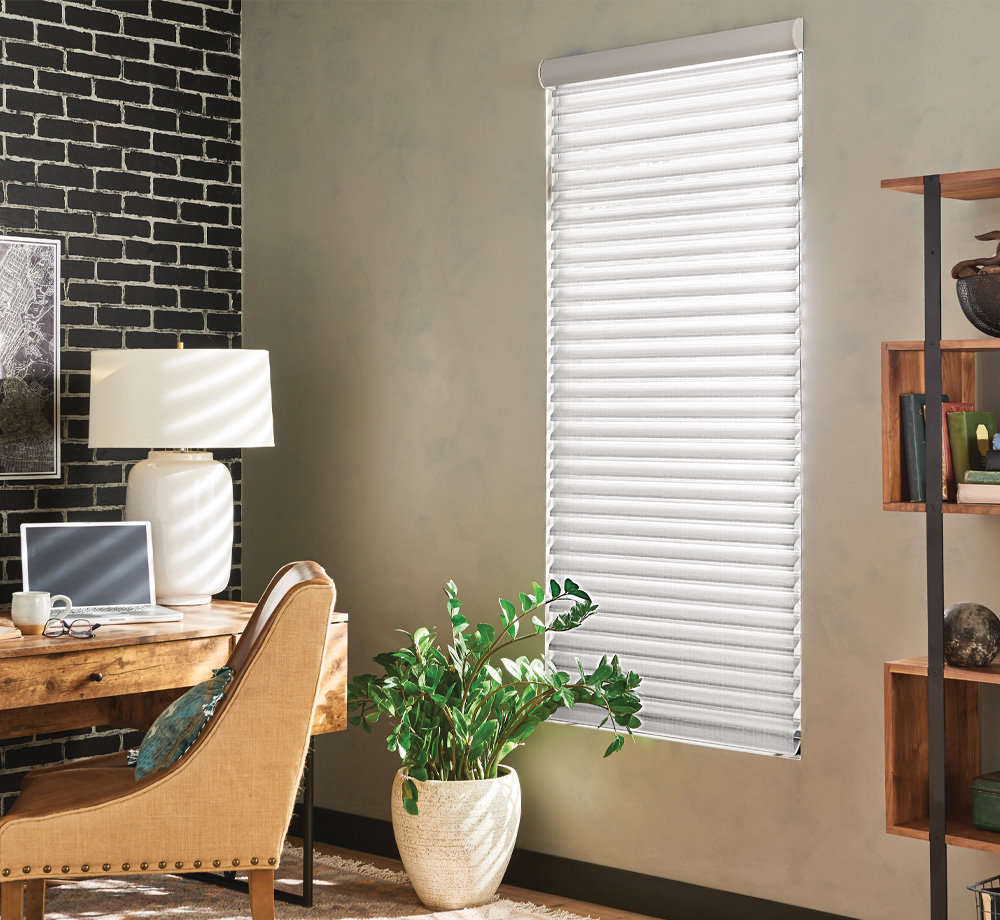
Discover durable and stylish premium shades for windows including quality sheer shades in a wide range of materials.


1. Installation Tips for Sheer Shadings


For the best performance and appearance, proper installation is a must. Here are some simple steps to help you install your sheer shadings effectively:

1.1. Tools You’ll Need


Before you start, make sure you have these tools on hand:
  • Measuring tape
  • Pencil
  • Level
  • Drill and drill bits
  • Screwdriver
  • >Screws and anchors (if necessary)
  • Ladder or step stool
  • Your sheer shadings and mounting hardware (included with your purchase)
Why It’s Important: Having everything ready before you begin will make installation easier and help prevent delays.

1.2. Measuring for the Perfect Fit


Accurate measurements are crucial for a clean fit and smooth operation.
  • Inside Mount:
    • Measure the width at three points: top, middle, and bottom. Use the narrowest measurement.
    • Measure the height at three points: left, center, and right. Use the longest measurement.
    • Make sure there’s enough depth for the sheer shadings to sit comfortably inside the frame.
  • Outside Mount:
    • Measure the width of the area you want to cover. Add 2-3 inches to each side for better light control.
    • Measure the height from the top of the window frame down to the desired length.
Why It’s Important: Proper measurements ensure a precise fit, preventing light gaps or installation issues.

1.3. Installing the Brackets


The mounting brackets are the foundation of your sheer shading installation.
  • Inside Mount:
    • Place the brackets inside the frame and mark the drill holes.
    • Pre-drill and attach the brackets using the provided screws. Ensure everything is level.
  • Outside Mount:
    • Position the brackets on the wall or window trim. Mark the screw holes.
    • Use wall anchors if necessary and securely attach the brackets with screws.
Why It’s Important: Correctly positioned brackets ensure your shades operate smoothly and stay aligned.

1.4. Attaching the Sheer Shadings


After the brackets are installed:
  • Align the headrail of the shade with the brackets and snap it into place.
  • Test the shade by raising and lowering it to ensure smooth operation.
Why It’s Important: Proper installation ensures the shades function as designed and enhance the look of your space.

2. Caring for Your Sheer Shadings


Once your sheer shadings are installed, routine care is essential for maintaining their look and longevity. Here are some simple ways to keep them in top condition.

2.1. Regular Dusting


Dust your sheer shadings regularly to prevent buildup.
  • Use a soft cloth, feather duster, or vacuum with a brush attachment to gently clean the fabric and vanes.
  • For harder-to-reach areas between vanes, use a microfiber cloth or soft brush.
Why It’s Important: Regular dusting keeps your shades looking fresh and prevents dirt buildup that can affect their appearance.

2.2. Spot Cleaning


For stains or spots:
  • Mix a small amount of mild detergent with water. Dampen a clean cloth and gently blot the stained area. Avoid rubbing, which can damage the fabric.
  • Rinse with a damp cloth to remove soap residue, and blot dry with a towel.
  • For more extensive cleaning, consider professional cleaning services for fabric window treatments.
Why It’s Important: Proper cleaning methods protect the delicate fabric and help your shades look new longer.

2.3. Preventing Damage


To protect your sheer shadings:
  • Avoid placing them in areas with high humidity, such as bathrooms or kitchens without adequate ventilation.
  • Handle with care when raising or lowering, especially if your shades have cords.
Why It’s Important: Careful use and proper placement help prevent damage and prolong the life of your shades.

2.4. Fixing Issues Early


If you notice any problems, such as misaligned vanes or difficulty operating the shades, address them promptly.
  • Gently adjust misaligned vanes by hand.
  • Check the mechanism for obstructions or wear, and lubricate moving parts if necessary (using manufacturer-approved products).
Why It’s Important: Early repairs prevent minor issues from becoming bigger problems, saving you from costly repairs.

Conclusion: Keeping Your Sheer Shadings Beautiful and Functional


With proper installation and routine care, your sheer shadings can provide years of elegant light control and privacy. Whether you’re installing new shades or maintaining your current ones, following these tips will ensure they stay in excellent condition.

For more advice on installation or maintenance, or to explore a wide range of sheer shadings, visit Blindschalet.com.


Shop Sheer Shadings

Back to Top
x Blinds Chalet Guarantee Options
DetailsStandardGuaranteed to LastGuaranteed to Love
PricingFREE$$$
Warranty Duration
3 year limited warranty
5 year limited warranty
Warranty Coverage
Defects
Parts
30 Day Returns(in-store credit)

complete details about our guarantee
Guarantee

What Is Covered

Our window coverings are covered against manufacturing defects in materials or craftsmanship when used as intended, provided that:

  • The product has been correctly measured, installed, and operated.
  • All Blinds Chalet guidelines regarding product limitations, maintenance, and care have been followed.

Who Is Eligible

This warranty applies solely to the original purchaser of the product and is non-transferable.


Blinds Chalet’s Responsibility

If a covered defect is confirmed, Blinds Chalet will, at its discretion, repair the product, replace affected parts, or provide a comparable replacement.


Costs not included: The customer is responsible for expenses related to shipping as well as any measuring, installation, removal, or reinstallation services. Labor charges, service visits, and similar costs are not covered by this warranty.

What Is Not Covered

  • Damage resulting from accidents, alterations, misuse, abuse, or neglect.
  • Improper measurement, installation, cleaning, or maintenance.
  • Normal wear and tear, including fading, discoloration, or deterioration from sunlight or moisture.
  • Frayed cords, cord breakage, or reduced cord performance due to age or heavy use.

Fading and normal aging of materials are expected characteristics and are not considered defects.


Warranty Limitations

This warranty is exclusive and replaces any other expressed or implied warranties. No Blinds Chalet employee or representative is authorized to modify or extend these terms.


Blinds Chalet will not be liable for indirect, incidental, or consequential damages resulting from product use or failure.


How to Request Service


Blinds Chalet Customer Care
[email protected]
(480) 470-1127


Please include:

  • Original proof of purchase, which can be your order number or purchase confirmation email
  • A brief description of the issue
  • The location of the window covering and clear photos or video of the issue


Resolution on Warranties and Guarantees
  • BlindsChalet.com reserves, at its discretion, the right to repair, replace or refund any blinds found defective. Limit 1 remake per covered product.
  • If there are multiple blinds/shades in the same room, only the defective product will be replaced/repaired.
  • In the event that a product, color or product feature has been discontinued and it is no longer available we will provide a substitute product as similar as possible to the original blind or shade.
  • Shipping for warranty issues is the responsibility of the customer to and from the repair facility. Packaging on return shipments is the responsibility of the customer.
  • If a product or component has been discontinued, Blinds Chalet will repair or replace the affected part with the closest available match in design and color.
5 Year Guaranteed to Last
  • Standard limited warranty extended from 3 to 5 years.
5 Year Guaranteed to Love
  • Standard limited warranty extended from 3 to 5 years.
  • 30 Day Returns
    If for any reason you are not satisfied with the window coverings and wish to return them for store credit, please notify us within 30 days of receiving the order. Our customer care department will provide a Return Goods Authorization number (RGA) and shipping address for the return. Please note, return shipping costs are the responsibility of the customer and shipping labels are not provided. Returns are for store credit only and store credit will be available immediately after the items are received (Guaranteed to Love fee is not credited).
ad
X
The term "Retail" price refers to the manufacturer's or supplier's suggested retail price for an item. The initially displayed Retail price is specific to a product with the selected dimensions and default options/features. Please note that the Retail price for the selected product will be provided upon specifying its width, height, features and options.

Please note that the Retail price may not reflect the prevailing market price or the regular retail price. It is common for products to be sold at lower prices than the Retail price due to various factors, including promotional events, discounts, market competition, or supplier agreements.

Products may be offered at the same or lower "After Coupon" prices during future promotional events starting on or after the final day of any advertised promotion.

Learn More